It's about time to face animators' Voldemort - Constraints. Constraining objects is tricky for animators, if we do it right, it can help us save a lot of time, and make things easier to animate; but it can also put us in an endless hell if we do it wrong. I'm not an expert of programing type stuff, but I wish I was. So the trick I'm going to share is more like my personal experience, and as usual, please kindly share your magic if you know anything that might be better.
There is a universal principle for me when using parent constraints. I usually make the heavier object the parent, and the lighter object the child. The heavier object will be leading the action most of time, and it will be easier to control if I make it the parent. For example, if there is a guy trying to lift a heavy ball, then I'll make the ball the parent, and the hands the child. This way I can animate the ball up and down first, and then work on the hands to eliminate the IK feeling.
Before we dive into animation, I would like to explain the way I usually apply constraints. This trick is very useful, especially when animating referenced files.
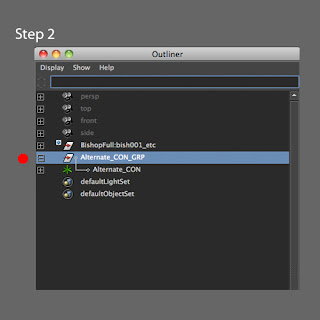
First of all, I'd like to clarify the differences between "Parent" and "Parent Constrain". "Parent" (p) will allow you to animate the child’s attributes, but is not able to be switched on and off. "Parent Constrain" is able to be switched on and off, but you can't animate the child’s attributes when it's on. So if you are using a referenced file, then the best way to set up a parent constraint is making an alternate controller. So you'll be able to switch the constraint on and off and animate attributes as well.
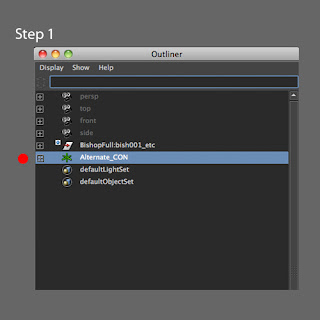
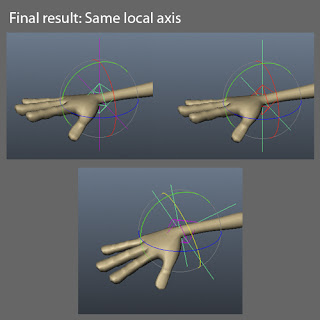
For the alternate controller, the goal is to build a controller which has the same local axis as the original one.
Step 1: Create a locator, and zero out the translation and rotation values.
2 comments:
Hey Erik now this was waaaay useful, awesome. When you get back to work you will need to show me this setup.
SURE THING!
I'm glad you found this helpful, Matt.
Post a Comment